(Guide last updated: Apr 06, 2023)
Software part:
Download and install the latest Raspbian Release for your Pi.
Take the version with desktop and recommended software!
The latest release has Bluetooth already installed.
https://www.raspberrypi.org/software/operating-systems/#raspberry-pi-os-32-bit
For this guide I downloaded Raspberry Pi OS with desktop and recommended
software,
filename: 2021-05-07-raspios-buster-armhf-full.zip
Unzip the downloaded file and use Win32DiskImager to transfer the image to a SD Card.
Put SD Card in your Pi and start your PI.
Pi will start up with a desktop, asking you to
set your local preferences, and give you the option to add a wireless network,
and will start downloading updates, which will take some time.
After the update is finished, start a shell on the pi, and start the raspi-config with:
sudo raspi-config
Go into the Interface Options and enable SSH, so you can access your Pi with
your PC and Putty.
If you want to use a CC1101 Module, then also enable the SPI Interface.
Now you can use a SSH Client like Putty on your PC, and perform further settings
using your PC.
Connect to your Pi using SSH, and login with:
user: pi
password: raspberry
Update March 2022:
Huge problem with WiringPi!
WiringPi is deprecated, and no longer existant in latest releases!
Use this solution to get WiringPi installed:
cd /tmp
wget https://project-downloads.drogon.net/wiringpi-latest.deb
sudo dpkg -i wiringpi-latest.deb
wget https://github.com/WiringPi/WiringPi/releases/download/2.61-1/wiringpi-2.61-1-armhf.deb
sudo dpkg -i wiringpi-2.61-1-armhf.deb
Now install RPITX as follows:
mkdir rpitx
cd rpitx
mkdir src
cd src
git clone https://github.com/F5OEO/librpitx
cd librpitx/src
make
cd ~
Now install some needed blootooth libraries:
sudo apt-get install libbluetooth-dev
Now we need the rtl-sdr libraries:
sudo apt-get install librtlsdr-dev rtl-sdr build-essential autoconf cmake pkg-config
Hint: If the Anroid App will no longer connect with the Pi, then following part has sometimes to be repeated after you have used sudo apt-get upgrade
We have to fix an issue with blootooth startup, so lets edit the bluetooth.service file:
sudo nano /lib/systemd/system/bluetooth.service
go to the line: ExecStart=/usr/lib/bluetooth/bluetoothd
and append -C at the end:
ExecStart=/usr/lib/bluetooth/bluetoothd -C
Save and exit with:
Ctrl+o -> Enter -> Ctrl+x
The changes will take effect after a reboot or by using these commands:
systemctl daemon-reload
sudo /etc/init.d/bluetooth restart
Install Soapy:
git clone https://github.com/pothosware/SoapySDR.git
cd SoapySDR && mkdir build && cd build && cmake ..
make -j4
sudo make install
sudo ldconfig #needed on debian systems
Update August 2022:
Little problem with the new Soapy Lib!
Following error might occur on trying to start the module:
"error while loading shared libraries: libSoapySDR.so.0.8:
cannot open shared object file: No such file or directory"
Try this to fix the problem:
sudo cp /home/pi/SoapySDR/build/lib/libSoapySDR.so.0.8.1 /usr/lib/libSoapySDR.so.0.8
cd ~
If you have a HackRF One, install the HackRF library:
sudo apt-get install hackrf libhackrf-dev
git clone https://github.com/pothosware/SoapyHackRF.git
cd SoapyHackRF
mkdir build
cd build
cmake ..
make
sudo make install
cd ~
Now download and install my module from my server:
mkdir rf
cd rf
wget http://www.ifoedit.com/rfcomm-server.tar
tar xvf rfcomm-server.tar
(Update: This old version is obsolete! You will get a new download link after purchase!)
Now you can start it with:
sudo ./rfcomm-server
If you have a RTL-SDR Stick or HackRF One connected, you can also specifiy a
listening frequency like this for 433.92 Mhz:
sudo ./rfcomm-server -f 433920000
If the module is starting without major errors, the first step is done.
Quit the program with CTRL-C, because we need to pair the Pi with the Android
Phone.
On the Pi, start the bluetooth helper tool bluetoothctl:
sudo bluetoothctl
agent on
default-agent
scan on
On the Phone, you can perform the pairing either using the Bluetooth-Settings of your Android-Phone, or by using the pairing option in the App:
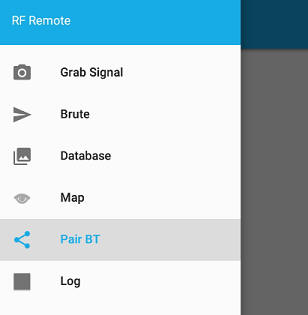
Start the Android App, and choose from the Main Menu: Pair BT:
Click the Button: Enable Discoverable,
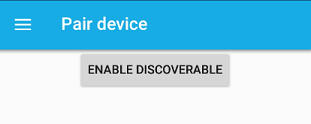
and wait until your Pi shell is showing your phone as new device.

Once it shows your phone device, you can see the MAC address in the same line.
Copy the MAC address of your phone, and use it in following lines and replace
the xx:xx:xx:xx:xx:xx with your phones MAC address:
pair xx:xx:xx:xx:xx:xx
trust xx:xx:xx:xx:xx:xx
On your phone you will have to accept the pairing request.
It may happen that the pairing was successfull, but the Pi still doesn't show up
on the Anroid Phone in the paired devices list.
In such cases keep repeating the pairing process, until your Pi is visible in
your phone.
Sometimes you will need to remove the paired device with this:
remove xx:xx:xx:xx:xx:xx
After this, the new pairing process should succeed.
To leave the bluetooth helper tool, type:
exit
Now you can connect to my module using your phone, so lets start up the module
again:
sudo ./rfcomm-server
In the Android App, go to Home/Grab Signal, and hit this button:
![]() to select your Pi.
to select your Pi.
Then choose the Pi you just paired, and it should connect without problem.
If your Pi does not appear in the list of paired devices, repeat the pairing
process as above.
Trouble Shooting: If the module is running on the Pi, but the Android-App refuses to connect to the Pi, check again if "-C" is present in this config-file:
sudo nano /lib/systemd/system/bluetooth.service
ExecStart=/usr/lib/bluetooth/bluetoothd
-C
Sometimes, when updating the Pi, this option might get owritten/removed!
To automatically start my module on powering up the Pi, lets edit the autostart by doing this:
sudo nano /etc/rc.local
You will see this:
#!/bin/sh -e
#
# rc.local
#
# This script is executed at the end of each multiuser runlevel.
# Make sure that the script will "exit 0" on success or any other
# value on error.
#
# In order to enable or disable this script just change the execution
# bits.
#
# By default this script does nothing.
# Print the IP address
_IP=$(hostname -I) || true
if [ "$_IP" ]; then
printf "My IP address is %s\n" "$_IP"
fi
exit 0
add your script to start, before the exit line like this:
#!/bin/sh -e
#
# rc.local
#
# This script is executed at the end of each multiuser runlevel.
# Make sure that the script will "exit 0" on success or any other
# value on error.
#
# In order to enable or disable this script just change the execution
# bits.
#
# By default this script does nothing.
# Print the IP address
_IP=$(hostname -I) || true
if [ "$_IP" ]; then
printf "My IP address is %s\n" "$_IP"
fi
sudo /home/pi/rf/rfcomm-server >>
/home/pi/rf/autosniffrf.txt
exit 0
Save and exit with:
Ctrl+o -> Enter -> Ctrl+x
If you want to start my module manually using a SSH Shell, you'll need first to quit the auto started module, by using the Android App, connecting to the Pi, and then choose the menu entry: Pi->Exit Server:
